
Taking the shot
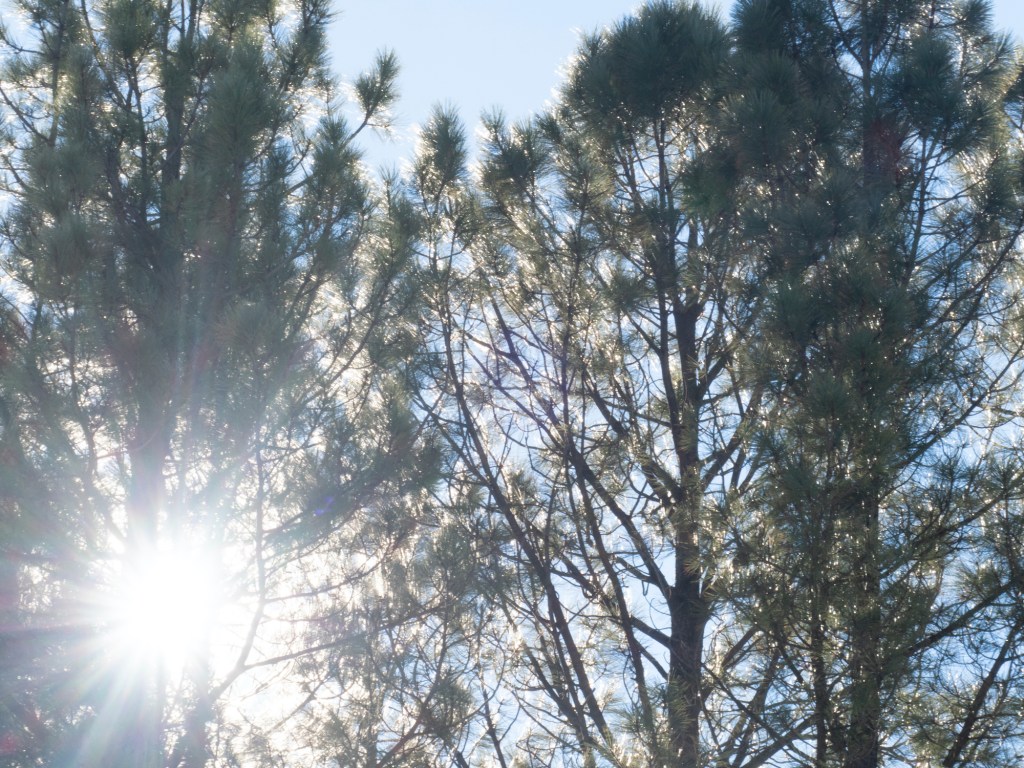
It’s dangerous to aim your camera at the sun. You could harm it as well as your eye, especially if you loook right at it for a prolongued period of time, or point the camera likewise. I am an amateur like many of my readers, so I am not 100% sure this makes it safe, but here goes— shoot through foliage. Also, if you do want the starburst as your final product, you must get a hint of it even as you point the lens toward the filtered sun. Take several. If one gives an even stronger hint of the desired outcome, work with that in “post.” Here’s the photograph I chose to work with:
Post production
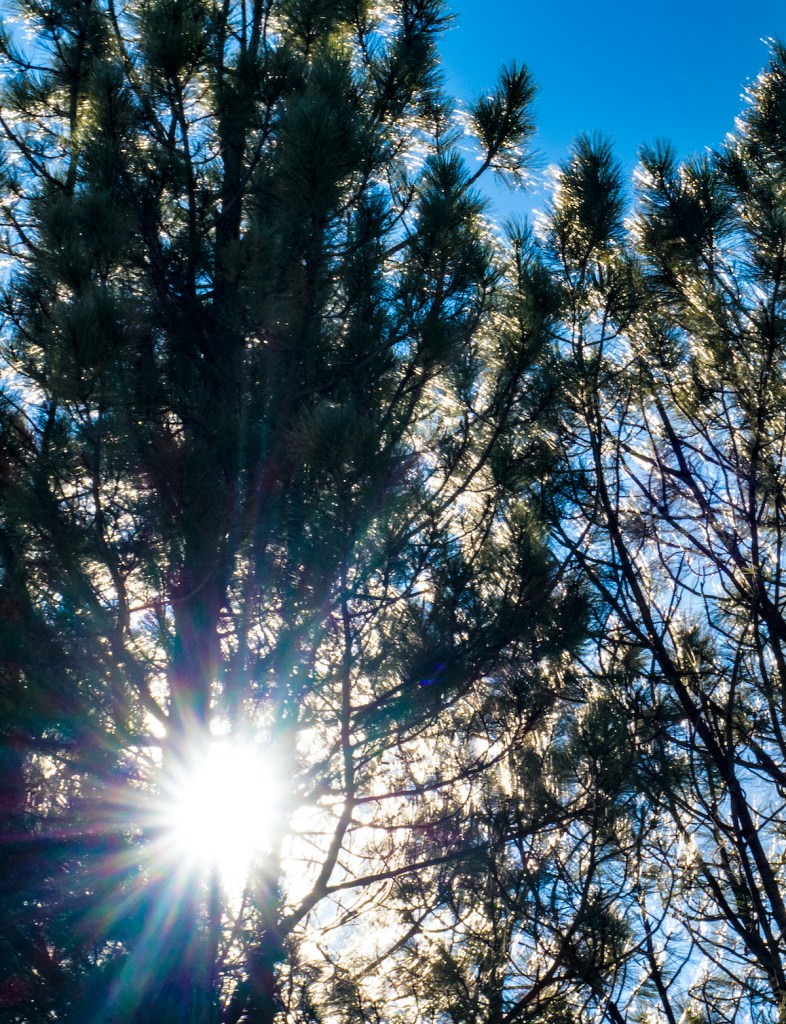
My “workflow” always involves Photoshop, and that is what I used to produce the “final” version below. Note, however, that Preview and Mac “Photos” will give you similar results.
So, let me back up. I shoot with an Olympus OMD E-M1 Mark ii, but my old Canon point and shoot could probably do the job. The only requirement is to be able to manually control the f-stop or “aperture,” and specifically to be able to max it out. My max is f 22. (Thanks to Lisa Langell for teaching me this.)
In “post,” the difference between the top and the bottom photos is accomplished thus—the reduce the exposure and increase Clarity and/or DeHaze. As you see, this changes diffuse brightness with only a hint of the starburst to something more like the arms of a starfish. Finally, you can add or by enhance color using Saturation and Vibrance.
Please visit wilcephotos.com and buy something tangible or digital. My earlier posts on THIS site also include links for purchasing digital downloads. THANK YOU!

Leave a comment